
Hey Hey! Happy winter! If you follow us on Instagram you may have seen the picture of this cutie I made over the weekend! It’s cold here in Utah and the snow keeps falling! Brrrr…I’m a warm weather lover and every winter I long for summer, but I do like watching the snow cover our beautiful mountains and wrapping myself in a warm throw while watching a movie. So, this weekend I decided to stay home and make a fun blanket ladder to keep our throws! This ladder would also work well as a towel holder in a bathroom!

There are dozens of variations of these ladders out there, this one is my own take. If there is one out there like it, then I didn’t see it 🙂 I did not want to use dowels for the rungs because it would make it harder to attach them to the sides. So I used 2×2’s. The sides are 2×3’s. This ladder is 6′ tall. I only spent $6 for the wood!. Holla!
The cut list? Easy. I had the nice guy at Lowe’s make all of my cuts, so I brought all of the pieces home ready to assemble.
- (2) 2″x3″x 8′ cut at 6 feet each
- (1) 2″x2″x 8′ cut 5 pieces at 18″ each

To attach the rungs:
Option 1: I used my Kreg jig and drilled 3/4″ pocket holes at the end of each rung. Then I used 1 1/2″ pocket screws to attach.

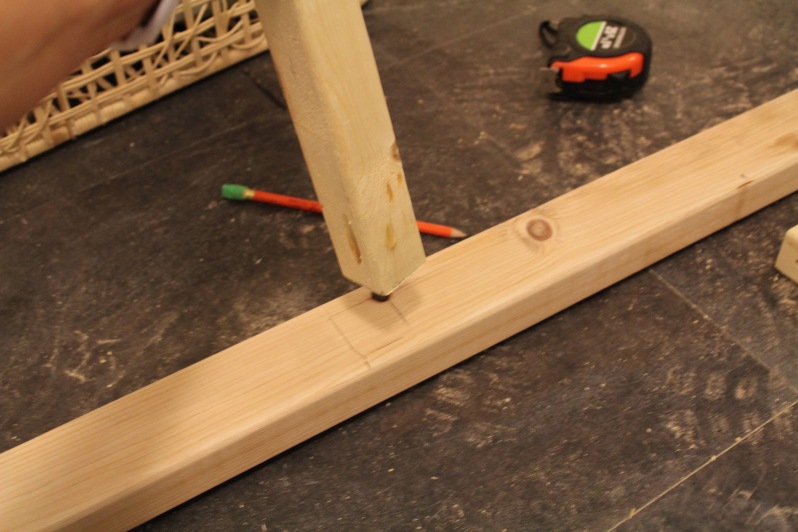
Option 2: If you don’t have a Kreg Jig you can attach the rungs with 3″ wood screws from the sides. I would recommend drilling pilot holes first if you use this option.

Make sure you measure and mark the placing of the rungs.

Once it was assembled I gave it a light sanding and stained it. I applied the stain using a clean rag, left it on for 5 minutes, then wiped the excess. The finish I used is driftwood. You can of course, use any finish of your choice 🙂

I followed up with a coat of polyurethane once the stain was completely dry.

Here comes the fun part. This is totally optional! I wanted to add a fun and unique detail. I found these cute L shape brackets which are actually corner protectors. I bought them on Amazon but you can find them at Walmart too! They run at just over $1 a piece. They come in a box of 8. I like the look, and they also cover the pocket holes! A win win!

So, from a price standpoint the brackets were the bulk of the cost of this ladder because I used 20 of them. If you are on budget, definitely skip these! But I thought they added a fun detail.
Here’s my gripe when putting these on though: They come with nails, but the nails are TINY and impossible to hold to and pound in without smashing your fingers. I ended up getting a regular nail and getting a hole started, then putting my tiny nail in so I could pound it without holding it. A little time consuming but well worth the effort, I think. You could get longer black nails to begin with instead of using the ones that come with the brackets. There are also a lot of variations of these corner guards, so find some that you like and get creative when decorating your ladder!
One last point, these brackets are for decorative purposes only. They aren’t strong enough to hold the ladder together without screws.
And that’s it! I loved this project!

We always appreciate your shares and pins and if you decide to give this a go, I would love to see a picture!
Thanks for stopping by!
Build away!
~Janice

Questions for you: my stain says I need to prep the wood with a ” water based pre-stain wood conditioner “. Is this necessary? And another Q: (I’ve not worked with stain very much)- what is the purpose of the poly and is it essential? Thanks so much!
LikeLike
I did not pretreat the wood at all. It did take darker in some places but I like that. The poly is not really essential. It’s meant to give the wood a longer life span by adding protection. I had some poly already but if you don’t, no worries. Can’t wait to see it!
LikeLike
Well YAY!!! You just made my night!!! Now I don’t have to run out to get the pre-treatment for the wood! I can just start staining! Super excited!!!😃 Thanks!!!
LikeLiked by 1 person